Entries in auto repair (16)

Monday
May292017

#SaveEddie, Part I: The Coefficient of Friction

Summer tires are a fine thing for driving. When I talk about my seasonal tire strategy, I’m often confronted with the inquiry, “Why don’t you just use all-season tires?”A part of me wants to tell them they’ll never understand. However, years of working in the service industry has trained me to temper my snippiness. Instead, I’ll illustrate that four-season tires are a compromise that results from convergence.


I’ve observed for many years that when the features of two products are converged into a single unit, the merits of these features always become compromised. The most successful convergence to my mind is none other than the Clock Radio: take a standard tabletop radio, glue on a digital clock, and interconnect the two such that the radio can be turned on at a specified time. Low and behold, it works! You set the trigger to five minutes before you head out the door for work in the morning, and sure enough the radio turns on at 7:55 A.M., thus waking you to the sound of morning talk show antics. You stir, looking for the source of the noise and see the current time displayed on the chronograph. Your half-asleep brain does a bit of arithmetic, then fires a surge of adrenaline through your body to get your lethargic ass energized to shower, shave, dress and sprint out the door while praying a power outage scrambled the time clock at work last night so you can slip into your office undetected by the higher-ups.


The Clock Radio works as advertised, even if your body clock doesn’t. However, you probably aren’t listening to Sublime’s new single on this thing. No, you want the good stereo your older brother bought with money from selling midterm answer sheets, don’t you? So, while the Clock Radio is a perfectly functional clock paired with a perfectly functional radio, it failed to exemplify the best attributes of either product. Sound quality is rather limited, given the single speaker. And, for many, many years, it wasn’t a particularly attractive clock, never destined to hang upon the wall alongside Great-Uncle Charlie’s self-portrait.


And so, we have the all-season tire: functional in summer, functional in the snow, but failing to match the potential in either when asked of it.

  Summer tires can’t cut into the snow because the tread pattern is meant to displace liquid water rather than powder, while the knobbly tread on a snow tire allows for some flex, meaning decreased grip in dry conditions.  As such, many drivers elect for a best-of-both-worlds approach, and have the dealer bolt on four all-season tires, and they won’t have to worry about it until they wear out.

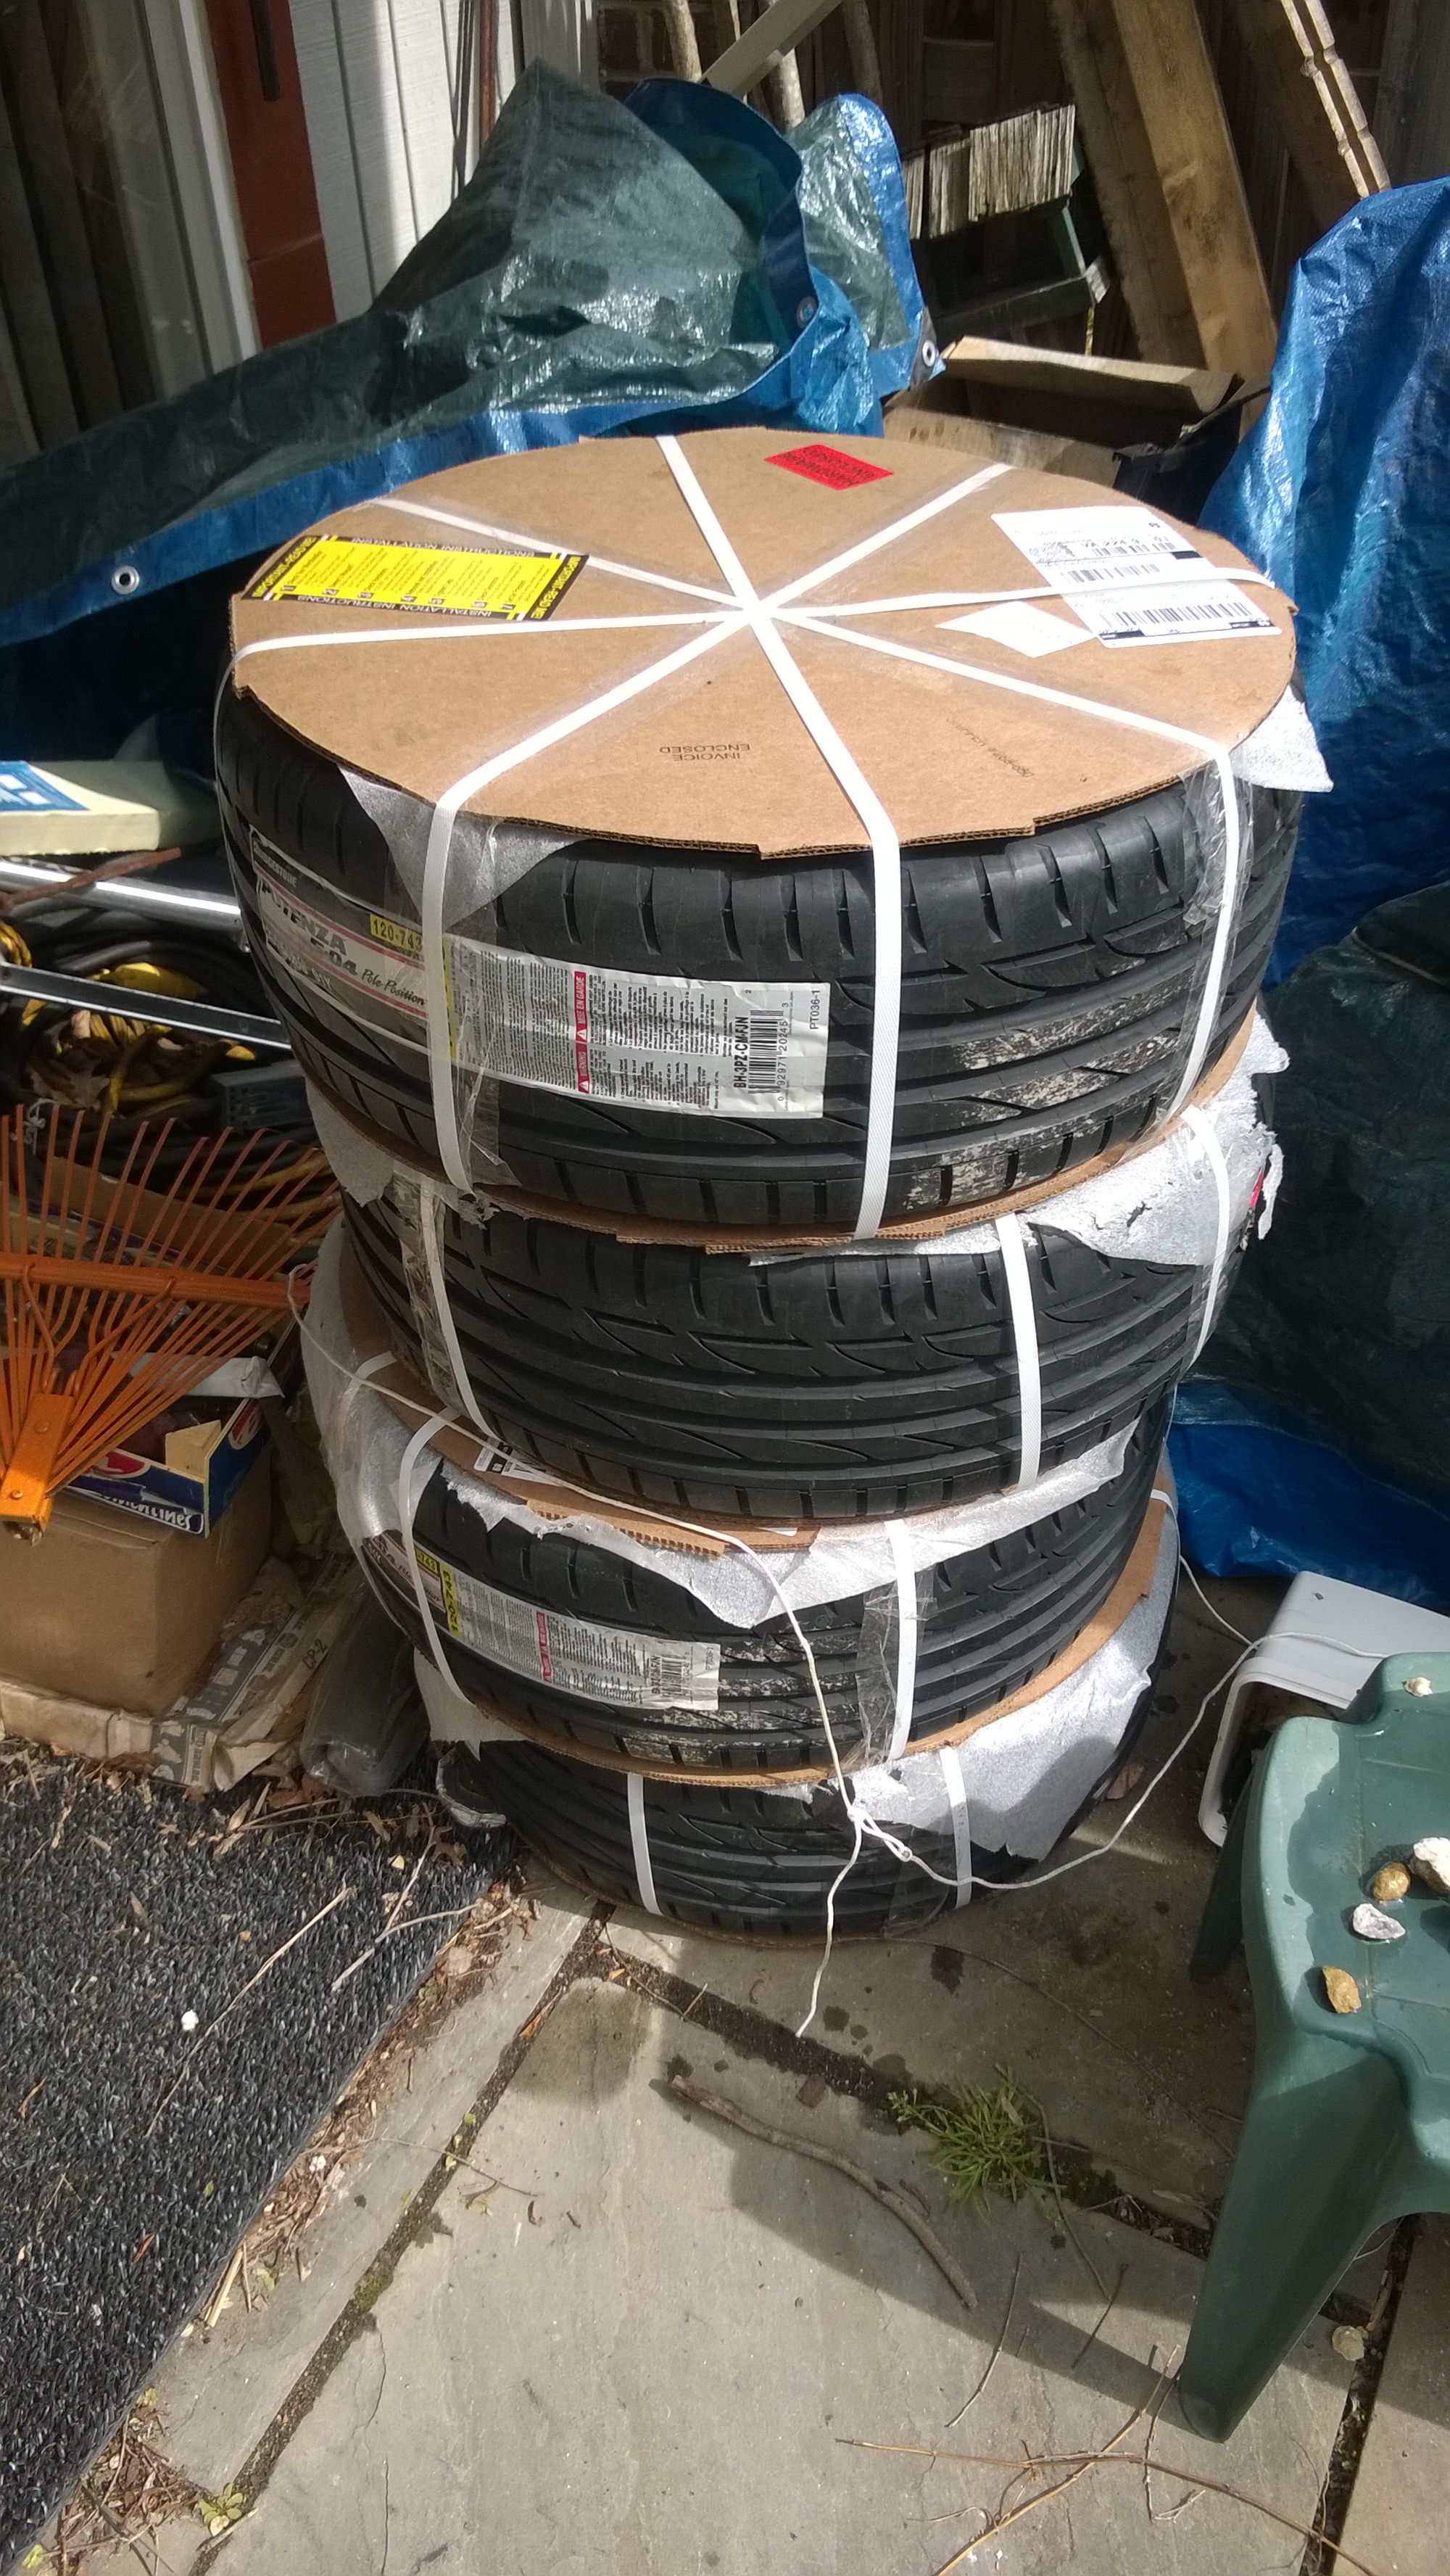
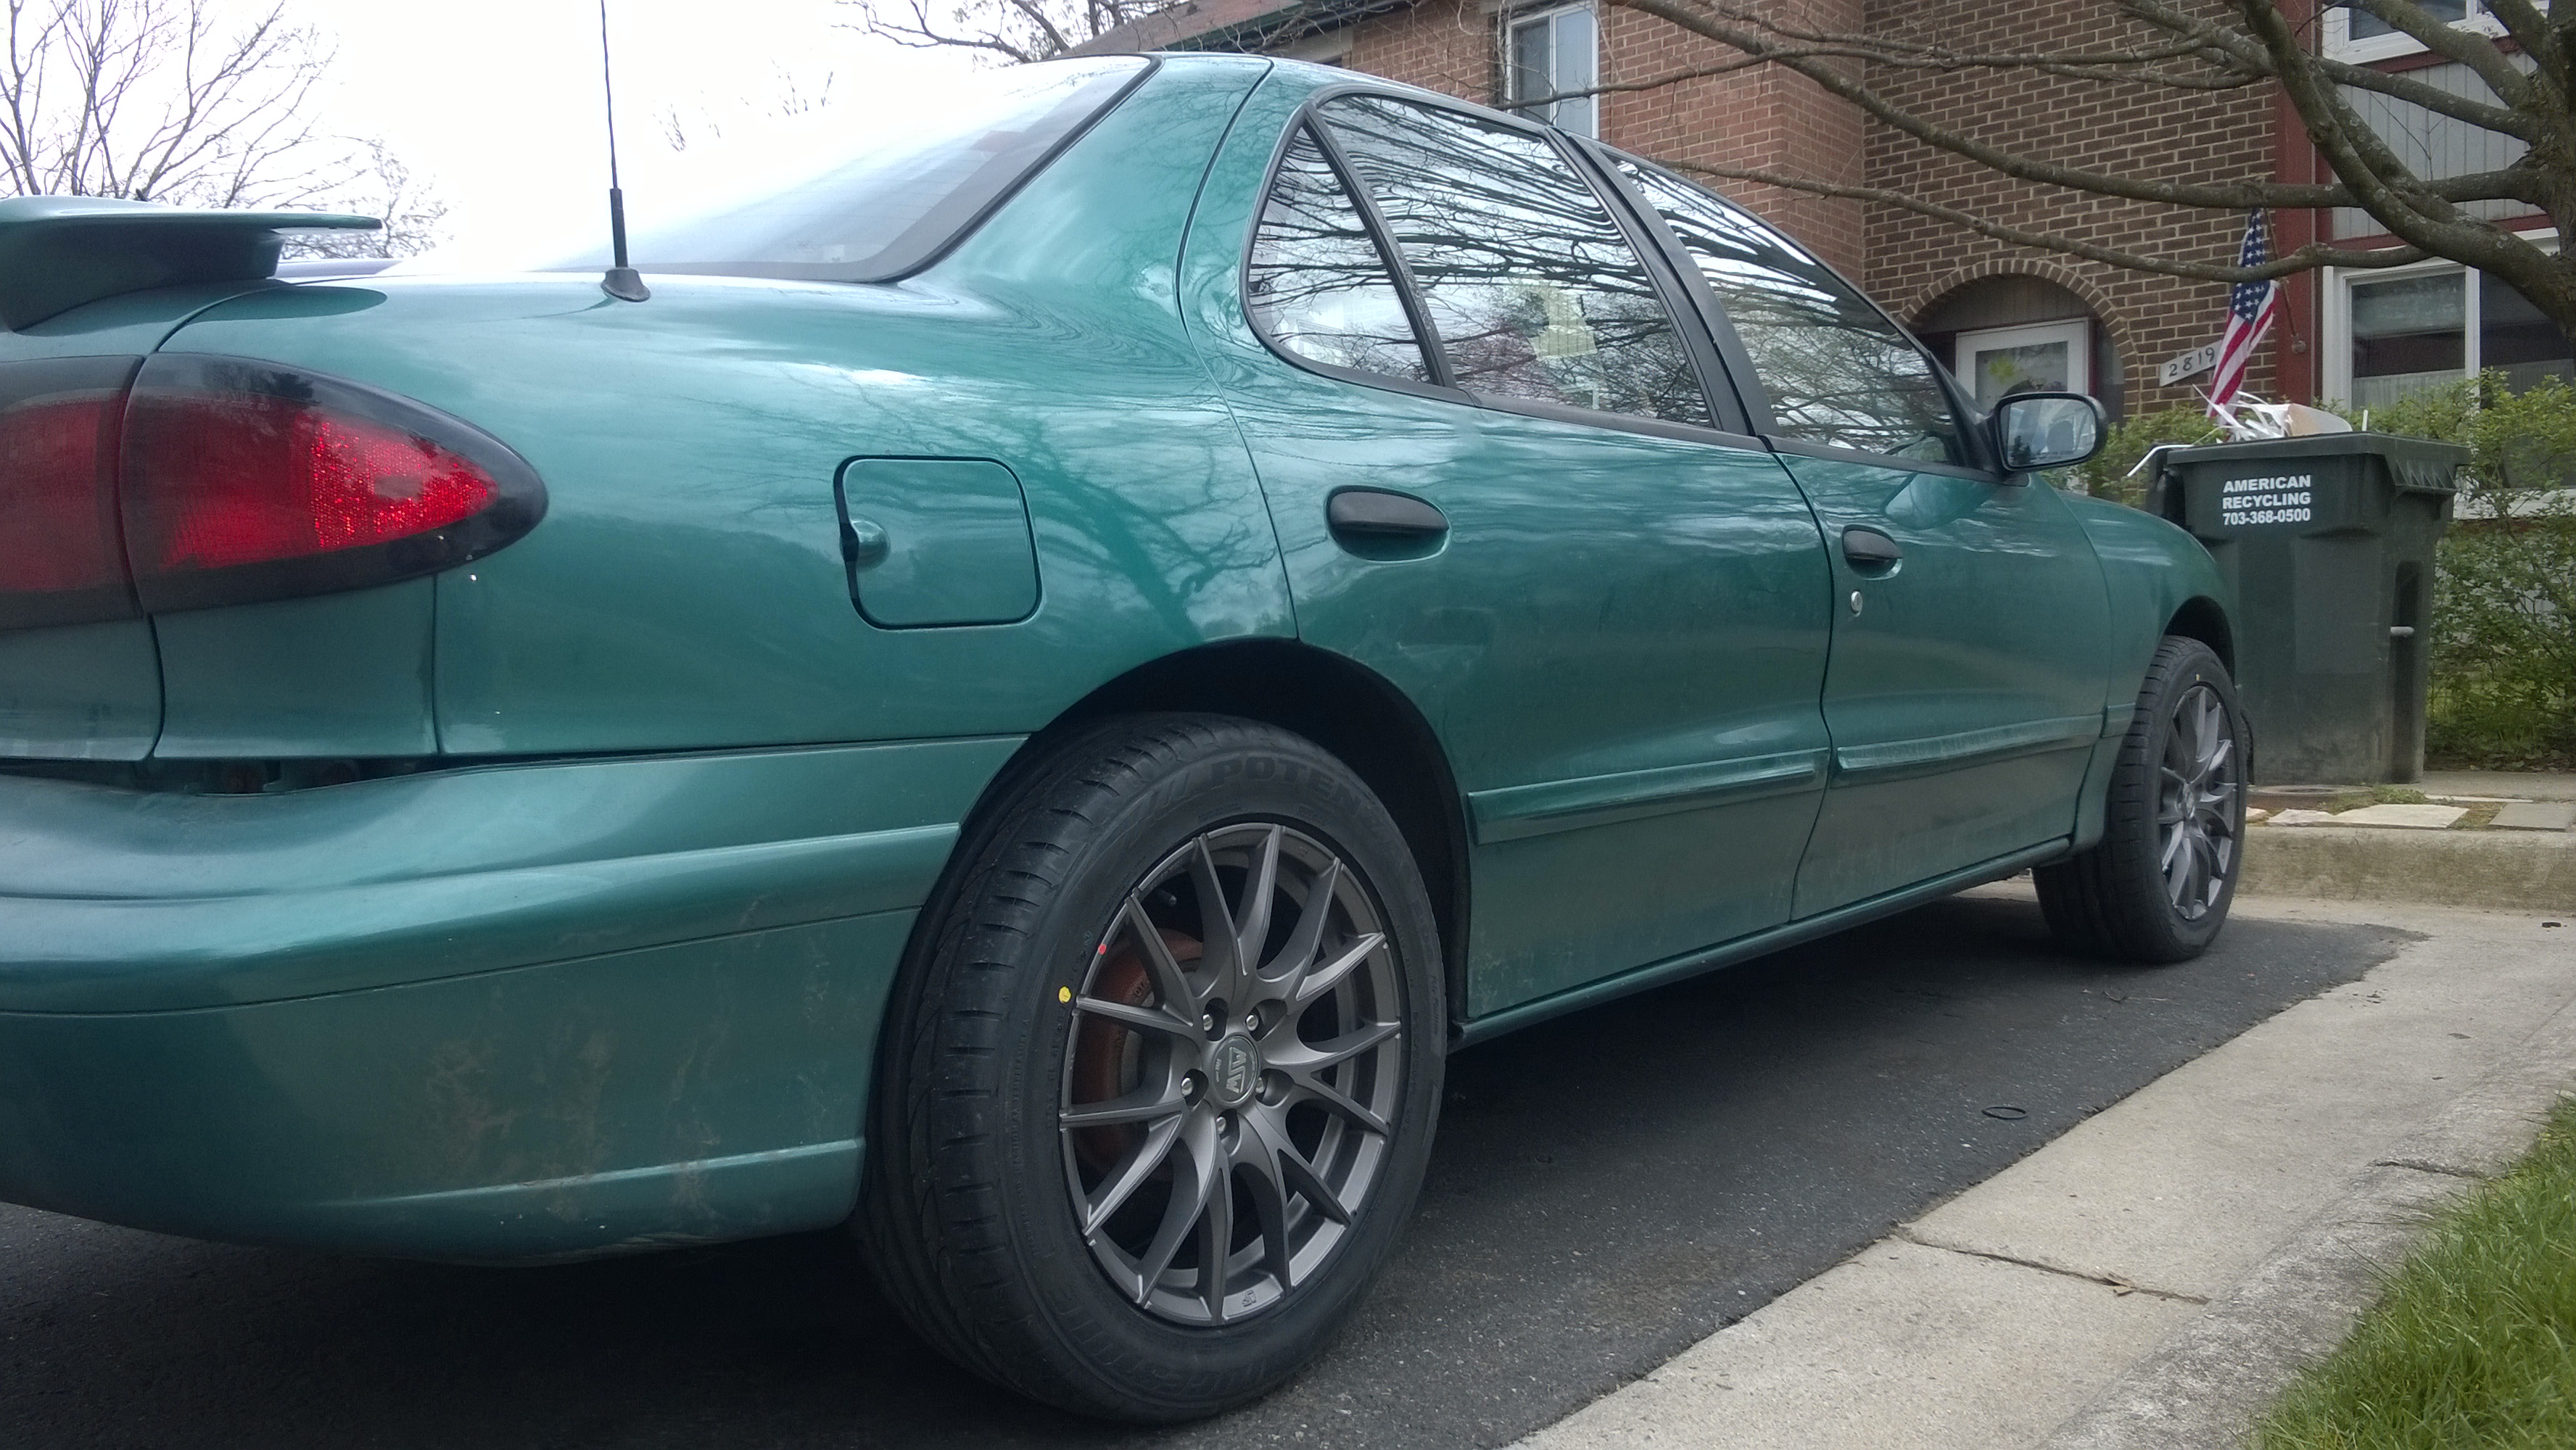
I take a different approach.  Last year, I purchased a new set of rims and had some Bridgestone summer tires installed on them. I took off my stock rims, which had winter tread on the front axle and still-good all-seasons on the back, and bolted up the new ones for a transcendent experience in traction. These tires provided me with a spirited driving experience all through spring, summer and fall, until early December when I switched them back. Some may see the twice-annual change as an inconvenience not worth having, but I consider it time well-spent for an engaging driving experience nine months out of the year and peace of mind during the other three.

Back to squishy, cold weather compound for a few months, which brings me to late February.

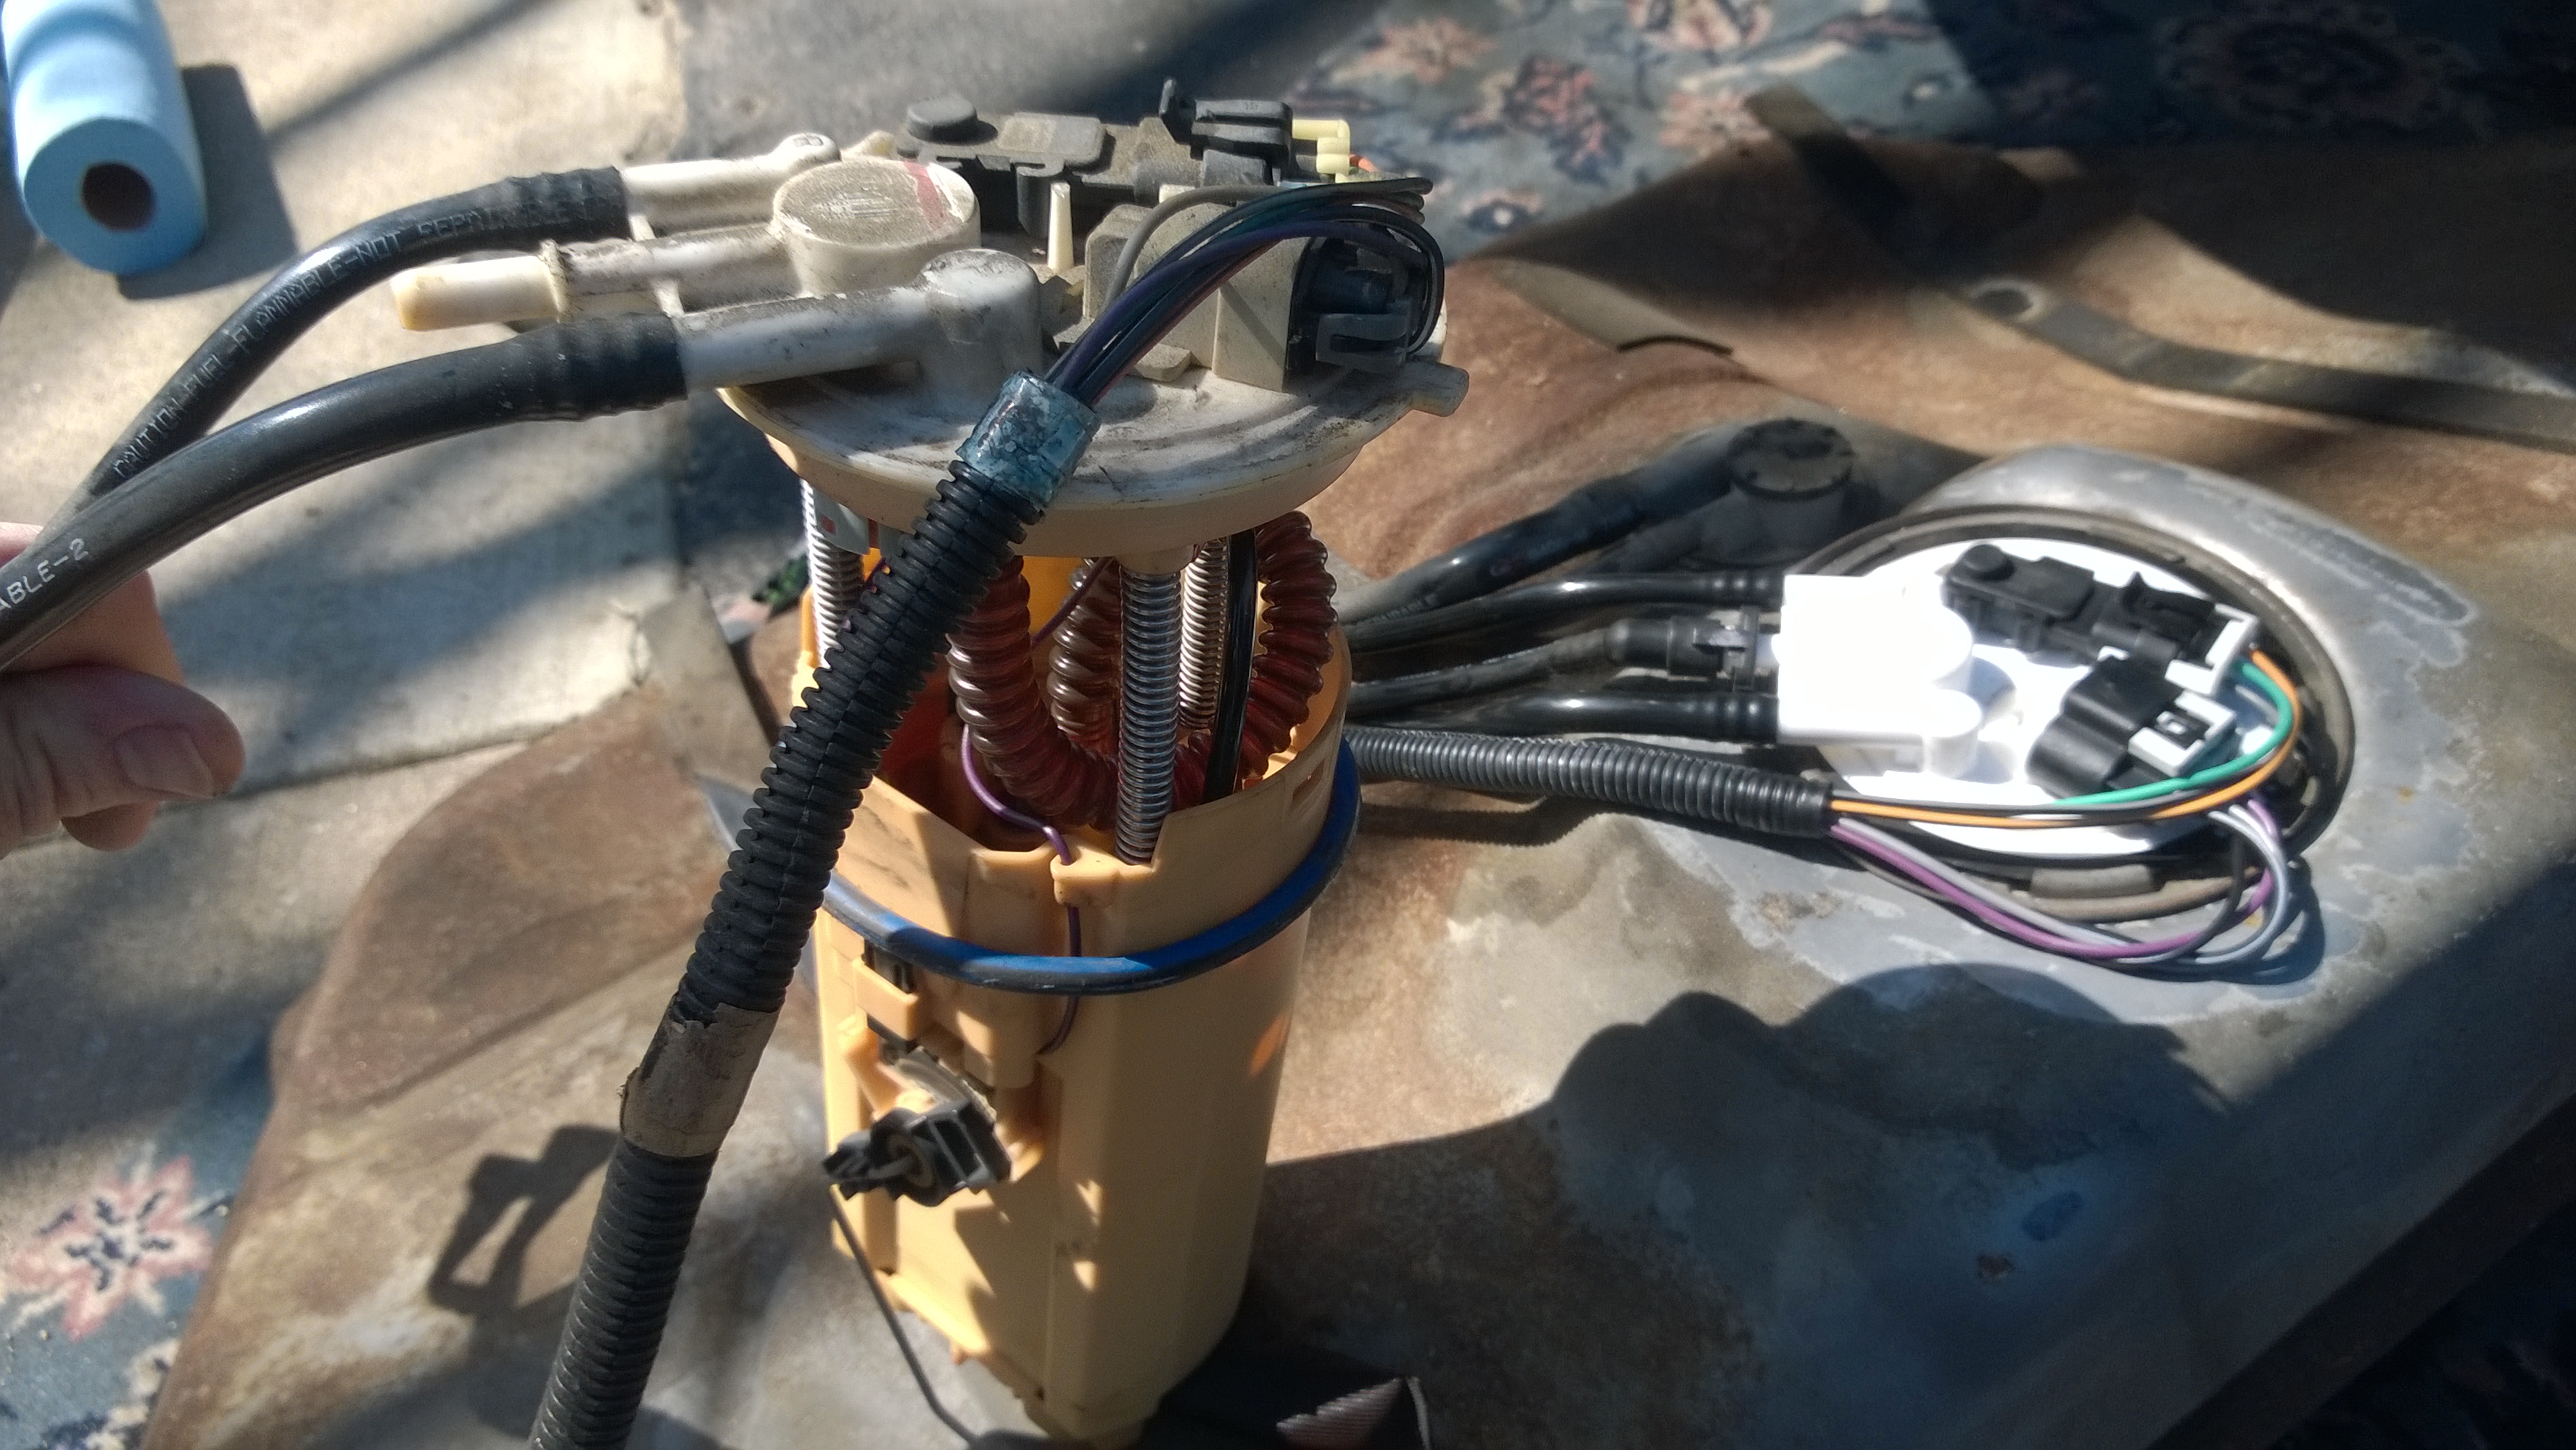
Conditions were moderate in temperature, but high in humidity due to earlier rainfall. Much of that moisture was still on the asphalt as I crested a hill to find someone stopping quickly to turn left off the busy street. The duty then fell to me to modulate braking pressure to avoid a lockup. Normally, the anti-lock brake system’s computer would do that for me, but thanks to a break in the wire leading to the front-right wheel sensor that I haven’t been able to chase down, my ABS is inactive. Locking up the brakes would be bad for me, since I have moving traffic on my right, while there’s oncoming traffic to the left, and if I were to spin it would be far worse than unfortunate.

So modulate the brakes I do, and I can hear these winter tires howl like a wounded animal; a sound generated by combining the flex of rubber under stress with turbulent airflow around the tire’s tread. My heart stops, hoping to inspire the car to do the same, but it isn’t enough in these greasy conditions to prevent Eddie from colliding into the back of a late 2000’s Nissan Sentra.


Friday
Apr152016

Leadfoot: Belly of the Beast

As 2015 gave way to 2016 in much the same way picturesque Autumn yielded to the nation’s capital going into a frenzied panic over half an inch of Winter snow, I was moved to reflect on the changes that had taken place in my own little bit of real-estate called Life.

Metaphors aside, I looked at all I had done to keep Eddie the Sunfire running since our acquisition in mid-2008.

First to go was a radiator hose, which had rubbed unnecessarily upon a bolt head on the water pump, wearing a hole and spilling red coolant everywhere I drove. Initially, of course, we thought it was just low, so we added more coolant. Then, when we saw the coolant coming out was brown, we thought it was really old coolant. We then figured out that someone had great faith in the car’s longevity and had filled the cooling system with red antifreeze.

Red antifreeze is meant to last much longer than the green stuff everyone knows about. But it turns out that when you don’t know what’s in it, adding green to red produces brown, making the coolant look extra old when it was probably still perfectly viable.

So, with the old hose wrapped around it for added protection, a new coolant line was installed. That process necessitated removing a wheel and four pieces of trim, which, upon later inspection, had initially been two pieces before a head-on collision with something solid.

Oil leaks came next, and with that came new air conditioning and torque strut mounts. Initially, the new mounts were installed because we drew the short straw and got state safety inspector who actually checks his work.

No problem, and thanks, Dad, for helping take care of that. Years later, I had forgotten how much the engine likes to lurch forward.

Then, over time, came brakes, an ABS wire, gaskets for the transmission pan and valve cover, two batteries, a starter and an alternator along with two headlights and a turn signal.

And six months ago, my mechanic friend said to me, “Is that your fuel pump I’m hearing?”

Sure enough, I walk around to the passenger side while the engine’s running and I hear it: The high, sickly whine of a small electric motor struggling in its old age.

So I went to the Internets for info, and found the fuel pump to be a composite unit including a strainer and fuel level sensor. This was fortunate, as I had a fuel gauge that liked to hop around once the tank would get down to half-empty. New pump added to cart, headed for check-out.

Further research found that replacing the fuel pump involves taking the whole tank out of the car. Some cars ask you to dig under the rear passenger seat, thereby exposing the pump for easier access and more readily spilling noxious gasoline onto your upholstery. Such is not the case with Eddie, so (after spending a week buying only $10 worth of gas at a time to keep the tank no more than half-full) once again I drive down to the parents’ house to make use of Dad’s jack stands.

To start off, I am now in the habit of just keeping my car-related tools in the trunk. Sure, it hurts my gas mileage, but that’s a small price to pay for the assurance that, should I break down on the side of the road, I’ll be able to fix it. So this rolling workshop rolls down to Dad’s workshop (which is more of a parking space).

Knowing the tank is a large part of the car, I figure I’ll need ample space to maneuver underneath. Ideally, I’d work with a lift in a garage with a transmission jack, but instead I have a hydraulic floor jack that barely lifts the car enough to reach the first notch on Dad’s jack stands. So I raid his collection of four-by-fours to gain another eight inches. Insert sexual innuendo here: (__________)

Jack stands fully erected (sorry), I crawl under to take my first ever good look at Eddie’s undercarriage (last one, I swear!), and I am frightened.

Rust is deeply entrenched into the sub-frame behind the rear axle at several spots. Two each where it crumpled after a Mercedes bumped him, and two just ahead of the spare tire well, where holes are set in the frame rail as if to attach something without actually attaching anything. It’s now so corroded, nothing could ever be attached to those points and be expected to stay put in the presence of a light breeze.

Easy enough to disconnect was the tank’s electrical connection, which includes power for the pump’s motor and signal wires for the fuel gauge. Then I have the hose that leads to the filler neck, kept in place by a sensible hose clamp which needed extra convincing to come loose. I don’t think it had ever been taken off since it was installed at the factory.

Then there’s three actual fuel-based connections. One goes to the filter and the other two are I don’t know what. Possibly a return line of some kind. One of the odd ones, which goes to a big black box that I mistook for an electronic control unit of some kind, needed mild convincing to come loose. For a moment I feared breaking the flimsy latch that keeps this connection together, because I don’t remember if this is a hose that’s already on the new part or not. After finishing, I still can’t remember if it was, so I’m glad I was careful.

The remaining line not involved with the filter is trickier. A YouTube how-to made mention of a “fuel line disconnect tool” which lifts away the springs in the connection to liberate the lines from one another. Easier watched than done. Despite the tool in place, it still took considerable force to pry them apart. Imagine trying to break a Chinese finger trap by overcoming its tensile strength. Now do it upside down, laying on your back without space for leverage while one end moves every time you pull, and you’re situated off to one side because next to you is an old cake pan ready to catch drips so your face doesn’t have to.

That was finally free, which left the line for the filter.

It’s funny now, but at the time I was rather annoyed that none of the videos I found mentioned disconnecting the fuel pump fuse while the engine runs and allowing internal combustion to cease itself, thereby de-pressurizing the fuel line. As you might guess, I didn’t do that either.

So after finally breaking free the engine-side of the filter, which weirdly involved one metric wrench and one imperial, I continued loosening the nut, which has a nice patina of rust to it. After about five turns, I get a gentle reminder the system is still pressurized.

Well, maybe “gentle” is the wrong word.

Now, in reality, it was probably no more than a quick squirt, but my memory paints a different picture. After all, when flammable liquid approaches your face in a frothy flurry, you don’t think “squirt gun,” you think of that tidal wave that popped up when Krakatoa erupted.

I’m just barely able to shut my eyes and pop the hoses back together before I’m showered, then I wriggle out from under the car, pull off the nitrile gloves I’m wearing and grab blindly for the super-absorbent roll of shop towels I bought a few weeks back. As I dab at my eyes, still not daring to open them and wondering if I could find my way to the garden hose without the benefit of sight, I flash back to the last time dinosaur juice was splashed in my face.

I’m no more than ten years old, vacationing at the family’s lake house. I’ve been enlisted to help Dad put more gas in the boat so further trips around the lake may be taken. Being an excitable little snot with attention deficit disorder, I’m, of course, distracted by a fish jumping nearby. Shifting my weight was enough to rock the boat so the flexible neck on the gas can slips out of the filler port, whiplashing premium unleaded straight up to my face.

It was quite uncomfortable.

Dad puts the gas can down and starts leading little ol’ blinded Me up to the house, step by uneasy step. We make it as far as off the dock onto terra firma, when Dad decides this is taking too long and hoists my whimpering ass onto his shoulder and hustles up to the spigot, liberally applying fresh tap water to my face.

Later that evening, it was debated why he hadn’t simply dipped me into the lake, where fresh water was closer and more plentiful.

Back with Eddie, I’m dabbing my eyes with a second fresh towel as the burning subsides, and I screw up my courage to take a peek at the world around me. The eyes feel a little raw, but vision is unimpaired. A few more blinks and I’m feeling better, no lake required.

So I shimmy back under to try and spot what else could go wrong. Nope, just the possibly-still-pressurized fuel line. I’m now wondering why I hadn’t bought safety glasses when I stopped at Autozone for the filter and fuel line disconnect tool. They certainly would have come in handy while loosening the tank straps.

Before that, I found removing the filter again produced nothing like the extinction-level-event earlier, either because all the pressure had already been relieved in that initial surge, or I hadn’t perfectly re-sealed the line in my blind panic and fossil fuel had dripped into the old cake pan while I was dabbing at my eyes, trying not to whimper like last time. Either way, separating fuel line from filter produced only a small drizzle.

The potential for danger evaporated like the fumes out of the gasoline spilled earlier, I set to breaking free the tank straps, which also probably hadn’t been moved since initial installation.

It took an 11/16” deep-well socket with a eight inch-long extension slotted onto the end of my ratchet’s handle and some good-ole Water Displacement, 40th Formula, to break each bolt loose, shaking free a small cloud of rust which threatened a second assault on my corneas.

I’m uninterested in spending an as-yet undetermined time holding my redneck-style breaker bar together as I work through seventeen years of rust, so I put the 17mm socket onto a universal adapter, slotted them with a 3/8” driver into my 18-volt drill and pulled the trigger, letting electrons do the heavy lifting.

Once I’d gotten the first one loose, bolt in hand, I remembered the local effects of gravity. I took another plank of wood from Dad, this time a 1x4, and used it as a cushion between my floor jack and the fuel tank, minimizing the chance of unnecessary creases or, even worse, a puncture. Jack in place, I rip out the sole remaining tank strap bolt via electric rotational force and let the tank rest upon the hydraulic lift.

This is where the tank’s various connections run afoul of the car’s rear “axle.” I say “axle,” because this is a front-wheel drive car, which hasn’t got a rear axle; merely a beam of angle iron, across which the rear brake lines and ABS cables can be tethered. Just about everything structural in that region comes from the suspension. Nevertheless, it is still an obstacle, and the biggest pain is the hose leading to the filler neck. In those cramped quarters, I had no idea that seventeen-year old rubber could bend like that without crumbling.

Careful release of the floor jack’s hydraulic valve while wriggling the tank’s various connections eventually reached a point of diminishing return, when the tank straps are the main obstacle. On one side, the strap needs to move to one side. On the other, the tank must be lifted in order for the strap to be maneuvered past the rear “axle,” eventually letting the tank fall further.

At last, the right side of the tank is touching tarmac, and I must slide it further to the right so the left side may get past sheet metal that smartly guards the tank from the hot exhaust, but annoyingly also keeps it from moving in a directly downward trajectory. Perhaps this is by design, I don’t know. Bottom line: it meant I had to take off the right-rear tire, since that was the one obstacle out of two that was more easily removed. Now I’m glad I’d adjusted the rear brakes so the handbrake now actually works since replacing the drums, since I’d otherwise have to put the car back on the ground to break the lug nuts free, or enlist a stranger to sit in the car while pressing the brake pedal.

Wheel liberated and set to the side, the tank can now slide to the right and come free. I hadn’t planned on it, but the 5’x10’ scrap of 70’s era carpet I’m lay upon to protect my knees from hard asphalt does an equally stellar job cushioning the tank, letting me easily slide it out into daylight.

When you drive on a road that’s been salted and sanded for snow, but the snow has since melted and all that’s left is the dust, you don’t get a real sense of what this dust is doing as it’s kicked up by your tires, swirled around in the various vortices created by an aerodynamically-imperfect shape hurtling down the road and assaulting the underbody until you get a peek at the crevices into which the dust settles itself. I found seeds from a maple tree on top of the tank. There’s no explaining that without the phrase “Chaos Theory.”

So, because seeds and leaves and grains of sand are unwelcome in a gas tank, I borrow a can of compressed air that my sister uses to scare the cats. Then some carburetor cleaner over the fuel pump to get the stubborn stuff. And more compressed air. Now to remove the circular retaining clip that holds the pump in. There are holes in the clip, into which the business-end of some specialty pliers can be inserted to compress the ring, letting it easily come free. Instead, I make do with a flathead screwdriver and a Leatherman, popping the ring out, one clip at a time, until it’s no longer held in by more than 180 degrees, and the compressed ring pops itself out.

Now, because the pump is probably the original part, it ain’t moving from its comfy spot. First, the springs that put pressure on the top and bottom of the tank to keep the thing in place have gone limp in their advanced age. A new pump assembly would have happily sprung, having been liberated. But this was like a victim of Stockholm Syndrome, being offered freedom only to deny it, favoring the comforts of captivity. Also, the rubber gasket that maintains a seal, keeping gas vapors from escaping into the atmosphere, has also gotten comfortable, actually suctioning itself to the two surfaces, and must be peeled loose like that sticky stuff they use to attach your new credit card to the letter which explains in fine print that you still have to pay for what you spend, else they send a team of ninja-trained alligator assassins armed with AK-47s to collect on the debt.

So with that in mind, the pump assembly comes free and lifts out of the tank, angling it halfway through to allow for the strainer (which filters the worst of the particulates) and the float level (which moves up and down according to the fuel level and actuates the resistor which tells the fuel gauge how soon the driver should start looking for a filling station) can be maneuvered out of the hole that is too narrow for the entire assembly to otherwise fit through.

Putting the old pump next to the new one, I see some differences. Since the problem with the old one was a noise issue, I splurged slightly on the one that advertised quieter operation, and the manufacturer seems to have decided that, instead of letting the product’s performance be the differing factor, their product must have a differing appearance. Yes, the plastic has that “brand new white” appearance, contrasting with the old one’s yellow that reminds me of when I had athlete’s foot as a kid and would peel off the dead skin habitually. And the hoses are nice and robust, not having any of the brittle quality of the old ones. The new one also came with new wiring, which quelled my fear of having to keep using copper that’s seventeen years old.

A more curious difference is the strainer at the bottom of the assembly. The old one seems to be a sort of micro-perforated tube of plastic sealed at both ends, looking like someone pinched flat the ends of a hot dog bun. The new one is some kind of felt, apparently meant to let gas pass through it like a lantern’s wick carries kerosene. It would certainly stop particulates from flowing into the pump, but I’m slightly concerned said particulates would get stuck to the felt, over time clogging it and necessitating a replacement. That’s a concern for another day, though. For now, I’ll settle for a pump that doesn’t threaten to fail with a death rattle.

New part inspection over and having looked in the tank for any undesirable debris, I maneuver the as-advertised “quieter” unit into the tank. Then I take it back out because I forgot to lube the new gasket. That’s important for both slipping it into place and creating an air-tight seal.

That done, now comes the difficult part of setting the retaining clip into place. The springs on this new one are brand new, and therefore stiff. I’m also meeting resistance from the gasket, which is getting compressed by the opening which has an ever-so-slightly smaller diameter than the gasket, and a new rubber gasket isn’t going to have quite the same modulus of elasticity an old one will. I’m actually now wondering if that wasn’t a polyurethane gasket they gave me…

This being a new part that was ordered online, and I don’t enjoy the idea of having to run around town looking for another one that might be inferior and cost more, I’m careful with the application of force I’m giving this part. The last thing I need to do is break it during installation. To protect the wires, I disconnect the couplers and set them off to the side, and try not to press down on anything that looks delicate, which doesn’t leave me a lot of room. Imagine pushing a fifty-pound weight straight up using the tips of your fingers; that’s what I’m dealing with.

Eventually, with the aid of a comfortably-handled screwdriver, I somehow grew a third hand and wedged the ring into place under one of the clips. This allowed me to systematically tuck it into the rest of the clips, one at a time until it was secured, and with great trepidation I stepped away, waiting for something to break, releasing the tension on the springs to send the retaining ring into the blue sky above, possibly in multiple pieces.

I must have hallucinated that happening, because after I blinked, everything was fine. I waited another thirty minutes for the inevitable that never happened. As it turns out, General Motors knew what they were doing when it came time to pick out the sheet metal for their fuel tanks seventeen years ago.

Now to do, in reverse, what I had done with the assistance of gravity. Once I’d reconnected the wiring couplers and placed the new hoses into the plastic do-hickey extending from around the filler hose that keeps the hoses and wiring from flopping around, the tank was slid down the carpet back under the car.

The tank strap on the driver’s side didn’t need to be dropped past the rear “axle,” so I carefully lift that side of the tank to rest upon the strap. I can then get the floor jack and borrowed 1x4 underneath it and start lifting. Occasional adjustments come in the form of futile tugging and pushing without the benefit of leverage before getting out from under the car and pushing one way or the other with my foot.

Having sufficiently lifted the tank with the jack, the tank straps can now get bolted into place, which effectively secures it into its proper position, taking the weight off the jack. With that disposed of, I can focus on reattaching the two fuel lines, filler neck and wiring harness.

If you’ve never connected or disconnected fuel lines before, it’s tough to know how much pressure to apply before the connection latches. So you make multiple attempts, pushing harder each time and releasing, hoping it caught. Then, under the red mist of frustration, you throw caution to the wind and shove them together with all your might until you hear and feel that satisfying click of the right things locking into place.

Then comes the filler neck, and since this is held onto the filler hose with a classic screw-driven hose clamp, I attach an 8mm socket to my power drill and let electrons do the work again. The fuel filter’s line also screws on like it came off, minus the fossil fuel shower I’d received earlier.

After an obsessive-compulsive double-check worthy of Adrian Monk himself, I get back to the driver’s seat and turn the ignition to the On position. This action, on a fuel-injected vehicle, activates the fuel pump for a few seconds to prime the system, much like an outboard motor boat has that ball on the line you have to squeeze before the motor will start.

I turn the key and I hear nothing. I try again. Nothing. A third time, listening real close, I finally hear (but only just) the faint whir of the new pump as it spins for a few seconds. With the confidence that I probably didn’t just imagine it, the key is turned to the start position, and Eddie springs to life without incident. Then I check for leaks.

So yeah, job done. Not a lot of drama, save for the spray of combustible fluid to the face. So the tools get packed away and I take off.

Then I have a rather profitable month of March at work, and I’m able to order Eddie a set of summer tires on aftermarket rims. These are delivered the day after I order them, which is faster than anything else I’ve ordered that wasn’t a pizza.

I zip those on real quick, and all of a sudden, Eddie is looking swag. The dark grey alloys sit well on Eddie, better than his old steelies with their plastic hub caps.

Then I took a test drive.

Remember that old adage your mom taught you to deal with teasing? The one about rubber and glue?

Yeah, turns out rubber and glue aren’t so different. I’ve never felt grip like this. And steering feels even tighter than when I installed the new tie rods. The ride is a little stiffer, which is to be expected of switching from 14” wheels to 16s. But this also helps telegraph the road surface, which is desirable for people like me who prefer driving to be an engaging experience.

And the ride is quieter. This is not unsurprising, since I had a pair of snow tires on the front axle, and those have a howl at freeway speeds which rivals the oversized off-road tires Jeep enthusiasts mount onto their Wranglers, and at low speeds they squeak like so many squished mice under a mill grinder.

I put the old wheels into temporary storage until I can get my own just before DC was hit by a freak snow shower in April. Since I had work in the morning, I was worried, since summer compounds aren’t worth shit in the snow. But it’s been so warm the past week, none of the white stuff sticks to the ground, so the work commute is like driving in a light rain, which these tires where meant to do, so they stick like Lord Business squirted them with the K.R.A.G.L.E.

I’m in love with these tires and I look forward to a whole Spring, Summer and Fall with them before switching back to the winter set. Then I’ll have my Smug Face again, since everyone will worry about snow, and I’ll be totally fine.

Tuesday
Sep152015

Leadfoot: Them's the Brakes

Another of those everyday annoyances I just learned to deal with was the brakes. Some days were worse than others, but an imbalance in either the front or rear brakes meant there was a pulsation when applying the go-slower pedal that changed its frequency linearly relative to vehicle speed.

In my ignorance, I’d first thought it was the anti-lock brake system doing its on-off thing. So shoot me, it was seven years ago and I’d never had a car with ABS before.

But then the ABS light started coming on. It wasn’t always on, I just noticed it more during inclement weather, so in my ignorance (again), I assumed this meant the system was working extra-hard. No, I have no clue where I got this idea.

Later I learned that an ABS light means you don’t have ABS. I found this out after an event on the interstate forced me to use some heavy braking. I felt the rear of the car come loose and saw white tire smoke behind me. Once I’d gotten clear of the Darwin Award candidate who decided to cross three lanes to get away from an exit, I thought to myself, “The rear brakes must have locked up when the weight shifted forward. …But the brakes shouldn’t have locked up, because my ABS light is on, and that means the system’s work… oh.”

Supposedly, there’s a way to use the light to diagnose what the problem is, exactly. I was never able to figure out how to do that, but investigation found it to be a faulty wire from the combination of oil leaks and front-end collision I mentioned earlier. All of this meant the anti-lock brake system had nothing to do with the pulsation in braking power.

So it must be the brakes. I couldn’t feel the pulsation in the pedal, and the steering wheel didn’t pull, so it must be the one of the rear drums that’s out of round. Imagine you’ve put all your laundry in one side of your top-loading washing machine. Once it gets to the spin cycle, the machine is going to start doing the Jitterbug all around the laundry room. And that’s not going to be fun for anybody, because nobody knows how to do the Jitterbug anymore.

Because of the imbalance, passenger comfort requires effort on my part. Coming from highway speeds, a light touch of friction brings me down to where I can downshift into second. The brakes even out a bit and I can apply more pressure, but then I have to ease back off and modulate with the pulsation, lest my guest become an inadvertent head-bobber.

So the drums need replacing.

The parts are ordered and on the way when I find the HVAC fan only works on speeds three and four. The blower resistor has gone bad. As summer comes to a close, this is problematic. In the mid-Atlantic, summers get brutal with heat and humidity, and Eddie has zero tint on his windows. So from late May to early September, I’m quite content to leave the air conditioning on a higher speed. Keeps me cool, because the sun’s rays have little barrier to entry.

But as the Earth continues its orbit, we start to lose the heat, but keep the humidity until November. Now imagine that humidity combined with the greenhouse effect of a car with no tint. It all equals an uncomfortable drive for me (a man who prefers the cold) until I introduce the cooling and drying effects of air conditioning. And without the outside heat as a contributing factor, fan speed three is just too cold (even for me). But a bad blower resistor means that’s the lowest speed I’ve got.

The Internet is a great thing for what it can be. Yes, we use it to send pictures of our genitals to strangers who don’t want them, but beyond the dick pics, lunch tweets, and clickbait is an immense hoard of information that’s already indexed for immediate access. I typed into Google, “Pontiac Sunfire blower motor resistor,” and right below some shopping results were two tutorial videos on YouTube on how to replace the part. One of them even went so far as to advise on how best to orient yourself in the car when accessing the deepest recesses of the passenger footwell.

Was it difficult to get to? No. It was impossible. I had to remove the blower to make it difficult.

I was thankful for my cordless drill and U-joints. I’d managed to get one of the bolts out using my smallest of ratchets in this most claustrophobic of space, but the back-and-forth motion combined with the flexibility of the U-joint meant the socket kept coming off the bolt head. Relief came from the constant rotational force of the electric motor in my lime-green drill.

And while the blower was out, I cleaned out the dead leaves. Now, with the new resistor and a clean blower I’ve got all my fan speeds and they work better than they did before they stopped working.

This I did while laying upside-down on the reclined passenger seat, my feet right about where a rear passenger’s ears would be. Actually, someone sitting there would have been helpful, so I wouldn’t have to fumble blindly for the right socket extension from the half-dozen I’d stowed in the cup holder.

Back down at my parents’ house with brake parts from the Internet, I pulled the rear wheels and hammered off the brake drums.

I’ve never been a fan of drum brakes. So many different parts, all needing to work together to achieve the same result as squeezing two pads on a disc brake. Every time I’ve had to replace something, I take a dozen pictures with my phone to reference how everything goes back together. And I always miss something in the pictures, so I’m at a loss with that one bit during reassembly, leaving me stabbing at straws until the springs are able to hold everything together tight enough to fit the drums back on.

About the time I’m about to clamp the new shoes in, Dad comes out and notices a leak in the brake cylinder.

That’s bad. Like, “need to replace it now before the problem’s even bigger” bad. YouTube showed me how bad it could possibly be when I’d asked the Clarksonion Rhetorical.

YouTube was also helpful when it came to removing the cylinder. The brake cylinder on a GM J-Body is one of those parts that’s put on before attaching the wheel hub. This makes it difficult to remove almost on the same level as the blower resistor. Thankfully, there’s a nice Canadian fellow with a liking for lock pliers who will show you how to remove it with a lot of hammering and a long screwdriver.

Once again, Eddie shows up in the neighborhood, here comes the sound of hammering steel.

Dear General Motors: In my experience, a wheel cylinder is more likely to need replacing than the wheel hub. Why would you not make the former easier to remove without first taking off the latter?

Their answer, apparently, is to equip the wheel hub with a hole on one side. This (theoretically) allows enough room to rotate the cylinder until it can be maneuvered free of its prison. But even with this “room,” it still took considerable hammering and prying to liberate the leaky little bastard.

And it took even more hammering and wedging to shoehorn in its replacement. This is all while brake fluid is dripping into an ever-expanding puddle. And the fluid is such a lovely shade of ink-black. That’s because I’ve never flushed the brake system. I need to do that soon as I get the appropriately-sized plastic tubing. There’s a plan in my head for that.

And after that headache, putting the new shoes on was the part I’d been dreading. Imagine a jigsaw puzzle, but none of the pieces fit until you put it all together. Then the shoes need extra hammering to get into place because the holding springs won’t do that job by themselves. Even when all the pieces are in place, the shoes kind of float around, contained only by the drum, so they need tapping into place so the drum can fit around them and line up with the wheel studs.

With the wheels back together, I rolled Eddie’s front wheels up onto ramps to drop the transmission pan again to replace the filter I should have replaced before. That went well.

Not so much trying to replace the spark plugs. The number four plug is possibly cross-threaded.

And I admitted defeat with trying to replace the alternator, which feels ready for retirement. But while I was able to pop the end of a serpentine belt remover into the appropriate 3/8” socket built into the tensioner, the arrangement of the engine bay was such that I didn’t have enough room to sufficiently loosen the belt. I could have gotten creative, but the day was long enough and I put it, too, aside.

So at the end of it all I’ve got a less-effective handbrake and the pulsation can now be felt more in the pedal than the body of the car. So I accomplished nothing I set out to do and only succeeded in preventing a bigger problem.

Not my most productive day. But the Eddie runs enough to trek 400 miles each way for my vacation. I’ll just keep my tools in the trunk when I head out.

Wednesday
Aug262015

Leadfoot Video: Rods and Cogs

A car’s fluids are all different colors so you know which is which without having to run a chemical analysis. I’m sure they all taste differently too, but I don’t recommend preparing a cheese platter to pair with them at your next social gathering.

But why does transmission fluid have to be red?

After seeing a puddle of it magically appear under my car after work, I’m convinced its visual similarity to blood is intended to strike fear into the heart of the automotive owner. Seeing a spill of gearbox oil evoked the thought of a loved one bleeding out on the duvet.

That’s not quite the thought that came to my mind, but that’s because I have no idea what a duvet is. But I did want to grab a handful of towels to stem the bleeding. But towels would only go so far. Eddie needed surgery and a transfusion.

The puddle of red drippings was really just the last nail in the “I have to do something about this” coffin. At times, Eddie’s transmission would slip, but only in the right conditions. Leaving the gear select in automatic, and turning left onto my home street, applying some throttle persuasion to carry on through the off-camber turn, the engine would rev up as if it were in neutral. After reaching about 3500rpm without actually going any faster than before, the computer would decide “Time for second gear,” and engage it. The gears would suddenly catch, engine speed is back down to about 1200, and I’m instinctively taking my foot off the Go pedal because I’ve just received a kick in the backside.

This was due to low transmission fluid. An automatic gearbox is a bit like me: it doesn’t work properly if it hasn’t got enough fluid. The difference between the two of us is that while the transmission needs Dexron, I’m much less picky. I can run on water, orange juice, Coke Zero beer, rum, whiskey, regular unleaded or the blood of my enemies. Always with ice, of course.

Adding fluid mitigated the issue, but when that problem returned, I knew I had a leak somewhere. I just had no idea how bad a leak it was until I’d stopped the oil leaks. Then, the slipping got so bad I added another quart of Dexron, only to find those frightening red puddles the next day. I knew then that a bottle of stop-slip wasn’t going to do the job, so it was back to that online retailer of auto parts. And because I had a coupon, I figured, “Why not do the tie rods, too?”

Tie rods are another of those parts that just wear out with age. They’re a critical part of steering the wheels. By that, I mean they actually turn the front wheels so the vehicle may proceed in the desired direction. If an end breaks… well, best case scenario is the car stops moving. Worst case is the car starts going in an undesired direction.

So after 15 years, I’m wagering Eddie could use some new ones. I don’t want him going in undesired directions.

And the last plan on my mind is replacing the output shaft seals. These are designed to keep the transmission fluid inside the gearbox while still allowing the axle to spin freely. My research found them to be a likely leak candidate. The parts being only $5, I figured it couldn’t hurt.

So, with a few cans of brake cleaner, Scotch-brite pads, disposable nitrile gloves, *all* the tools I own, and the parts I’d ordered, I made my way back to my parents’ house. I also brought a six pack for my dad as payment for borrowing his grease gun.

The day started off rough. After loosening the axle nut (and having to buy a deep well 30mm socket), standing the car on a few four-by-four wood blocks and taking off the wheel, I hit my first snag.

Contrary to the norm, the stock tie rod ends aren’t secured with a castle nut and cotter pin. For the uninitiated, here’s a picture of the standard setup. The pin runs directly through the bolt and the open spaces in the nut to keep the assembly from unraveling.

Instead, Eddie’s tie rods were secured with some kind of epoxy inside the nut, and no amount of penetrating oil would facilitate its release; only leverage would do. I didn’t discover this until after having to borrow a deeper 18mm socket than the one I had. Because I didn’t have an 18mm open-ended wrench.

Hey, I never said I’d had every tool I’d need.

So then came removing the tie rod from the knuckle. Funny, everyone online made it look so easy. One guy made it happen with a few taps of a hammer. So in my arrogance, I thought I could make it happen with less effort.

I’m starting to think my parents’ neighbors have begun to associate Eddie’s appearance with the sound of hammering on metal, because no one batted an eye as I wailed on this God-forsaken steering rack extension.

WD-40 wasn’t doing me many favors that day. When the tie rod wasn’t going anywhere, I cut out part of the already-punctured boot in the aim of applying oil from above and letting gravity help with the capillary effect.

While (I hoped) the oil did its work, I turned my attention to removing the axle in order to replace the output shaft seals. Two bolts keep the spindle firmly connected to the strut. They’ve got teeth around the shaft nearer the head, to keep them from spinning while tightening or loosening their corresponding nuts. The friction these teeth provide also make them difficult to remove without the use of a hammer.

But these strut bolts weren’t nearly so stubborn as the tie rod end, so a few good whacks and they popped right out. There was still some residual friction between the spindle and the strut, so it took a bit of leverage to pry it free, but free it was. Some taps on the outside of the wheel axle had it loosened from the hub as well.

But being free of the strut wasn’t enough space to wiggle the CV joint out of the hub completely. The spindle needed a bit more freedom, and since I was already taking off the tie rod…

Nope, still seized.

A visit to the auto parts store later via my sister’s Golf, I had in my possession a borrowed tie rod end separator. That, along with the hammer used liberally earlier, finally made short work of the seized connection. What a satisfying “thunk” that was.

The outer end was indeed shot. No resistance in the joint, contributing to the loose feeling in the steering wheel. The inner joint was stiffer, but not by much.

Next was dropping the tie rod back into the spindle for added leverage so I could undo the lock nut.

Yeah, turns out the outer end wasn’t the only thing that was seized. And all the WD-40 in the world wasn’t about to undo fifteen years of elemental exposure without the assistance of some serious leverage.

Enter, again, the come-along. Yeah, seems like I can’t ever stop keeping that thing in Eddie’s trunk.

Wrapping mule tape around the maple tree in front of the house and clamping some lock pliers onto the nut, the come-along was hooked up in between.

It’s after snugging up the ratchet do I realize the only thing holding up the front of the car is a couple of four-by-fours. No, I’ve decided I’m not stopping.

Turns out an emergency brake is more than enough to keep Eddie from moving before the outer tie rod breaks free from the inner. Thanks, Physics!

With that loose, I counted the number of turns it took to get the outer end off and turned my attention to the still-seized nut.

At least, I should have. I should have taken a bucket of WD-40 and dipped the tie rod into the immersion for several hours. But I didn’t. Instead, I was so aggravated by the tie rod ordeal that I started on the transmission pan.

For all the research on the matter I conducted, I really should have discovered that there isn’t a drain plug for the transmission pan. Instead, armed with the assurance that “the fluid will come out somehow,” I started work. So I shouldn’t have been surprised when the super-simple catch can (consisting of a piece of molded plastic which feeds into used 2-liter soda bottles) would prove insufficiently small for the amount of drippage that would take place.

So a mess was made. There’s probably still an oil stain where all that oil dripped onto the asphalt.

See, when I saw there wasn’t a drain plug, I thought I could contain the flow by positioning the narrower end downhill, and jacking the opposite side slightly higher. In my mind, that would minimize the spill if I undid the downhill bolts first.

Perhaps it did. Perhaps the smallest mess possible was the one I’d made. It’s still a lot of oil spilling everywhere, because I’d forgotten that when oil can potentially go somewhere, it will.

Regardless, I upgraded to a bigger catch can. When I say “bigger catch can,” though, I mean a two-foot diameter, two-inch high circular pan, the true purpose of which I could not imagine.

So, slowly opening the uphill bolts on the pan, I eventually got the spillage to the point it was all pouring into the pan. That made me happy.

Eventually, the dripping stopped, and I could completely remove the pan without gearbox oil splashing everywhere.

Free of the anxiety over unpredictable drippings, I could finally examine the problematic gasket. Being so non-uniform in its structure, I’m left to assume (post-operation) it’s a liquid gasket. That’s to say whoever applied it squirted silicone onto the mating surface, then squished the pan into place and tightened the bolts, but not too much.

This must be why the pan is leaking again. All the bolts I tested were loose. Clearly, the plan was to bring me back to the shop soon for more maintenance.

Thinking back, I remember a trip to Jiffy Lube while I was still in film school. The kindly manager told me I had a transmission leak. Those words scared me as much then as they do now, because I was about to embark on a project that would have me commuting 100 miles round trip each day for two weeks. If not for the voyage upon which I was about to embark (the next day), I would have waited for dear ole’ Dad to give me a second opinion. Instead, I saw the distance I must travel with this potential problem lurking, and ended up dropping $300 on what was initially a simple oil change. I now see that Jiffy Lube simply used liquid silicone to make a new gasket instead of calling around to local shops to see if anyone had a proper gasket for the 3-speed.

Five years later, I’m left with red puddles. The oil leaks might have contributed to the degradation, but I’m comfortable blaming the shop.

Scotch-brite, brake cleaner and elbow grease had the mating surfaces clean and ready for the new gasket. The bolts also got a cleaning, because liquid gaskets can and will go everywhere. I’d also cleaned the outside of the filter, since it had fallen out of its mount when I was wrestling with the axle.

Which wouldn’t come out. Of course, the filter fell out on its own, but the axle is stuck in the output shaft. Granted, I didn’t have any tool that would have properly facilitated the axle’s removal. I suppose I was under the impression that an axle could be removed with confidence and a stern talking-to. But no.

Stuffing the axle back into the wheel bearing, I turned back to the tie rod. Yeah, that tie rod, the one that I didn’t dip in penetrating oil like I should have. That lock nut is so seized that trying to loosen it with the come-along just turned the inner tie rod itself. It was enough to get the outer one off, but because I couldn’t get that nut free, I couldn’t take off the inner boot, which is what stops me from applying the special inner tie rod remover tool. Daylight was burning, and the inner rod felt okay enough for me to put it on the back burner. For now.

With the lessons learned from the driver’s side, I attacked the passenger side. Made for about the same progress. And the same lack of progress.

The sun was about to start hiding behind the houses, so I screwed on the new outer tie rods, dropped them into the spindle and applied the castle nut and cotter pin. None of that epoxy-in-the-nut nonsense.

I then returned to the transmission pan. Had I used ramps to get Eddie in the air, I would have had more space to work with, but the floor jack I have is really only meant to get the car high enough to extend the suspension so the wheels can come off. It doesn’t allow much space for crawling around underneath. I also had to somehow keep the gasket lined up while positioning the pan for attachment.

Enter duct tape. Duct tape was my friend in that moment.

No, I hadn’t taped the gasket to the pan. That would have been stupid. Instead, I slotted some bolts into the holes and taped the heads to the pan. Those bolts kept the gasket in place while I held the pan against the housing and fumbled blindly for another bolt to thread by hand just barely outside my reach because I don’t fit under the car unless I’m flat on my back.

At this point, the cordless drill I bought is earning its keep. A 3/8” socket driver meant I wasn’t spending my time down there with a ratchet. Instead, it was setting the drill’s clutch and pulling the trigger until the thing stopped spinning.

The day’s charms were wearing thin on me, so I expedited putting Eddie back together and cleaning up the spilt oil with the grease-fighting power of Dawn and a hose. Worked better than I thought it would.

Driving Eddie to test, I knew right away he’d need an alignment done. The steering felt tighter, but tire noise was intrusive even at ten miles per hour. Also, while steering straight was fine, when turning right the car wanted to steer back to center. And turning left made the car want to turn left even more. Toe adjustment was definitely in need.

What I hadn’t noticed when driving to the shop was that Eddie wasn’t using all the available gears. That’s because I didn’t drive anything resembling fast when he was out of alignment. No, it wasn’t until I got onto an interstate after having the alignment done did I ask myself, “Shouldn’t it be in third by now?”

In a three-speed gearbox, third gear is kind of important. At highway speed, second gear has the engine turning around 4000rpm. That’s the peak of the torque curve, so it’s very sprightly and easy to overtake the left lane hog in a Camry.

Why is it always a Camry?

And the engine sound great at four grand. As long as it’s under load. Otherwise it’s just a loud drone, like a vocally-amplified economics professor.

Despite that, the steering feels good. Like I’m driving a car that’s eight years old instead of sixteen. I doubt I’ll ever get Eddie back to showroom condition without some real investment on my part, but I can do my best, can’t I?

Chatting with my car guy coworker, he suggested a bit of the gasket might have been sucked up into the transmission and was blocking a valve, preventing third gear from engaging.

I let it go, because I was tired. Also, my commute to work never has me exceeding 50mph, so the car is comfortable with second gear at that speed. Feels like I’m on a track day, only on my way to work.

I was prepared to let it go until I could get time to replace the transmission filter. Then, after a busy night at work, I was headed home and, upon joining Route 50, I noticed the engine wasn’t turning nearly so fast as before.

Third gear came back. All by itself. I’m now convinced this car is magical.

I’m still going to replace the filter, because I’ve no idea when it was last done. And yeah, I cleaned it, but it’s still something that I should have thought of replacing when I cracked open the pan in the first place, but I can only think ahead so many steps.

Also, that ABS light came back on…

Wednesday
Aug122015

Leadfoot: Water Conducts Electricity

When you drive an older car day-in and day-out, you learn to deal with the things that are wrong with it. Things like slow oil leaks, broken air conditioning, loose steering, that funny squeak the door makes when the right-side tires go over bumps.

Then the day comes when the oil puddle in your parking space has expanded beyond the painted white line, and your wheels roll over it, leaving more oil marks all over the lot as you head off to work. That’s when you sigh, slip on some work gloves and break out the floor jack.

You also go out and buy as small a bag of kitty litter as possible. Because you don’t have a cat, but the conditions of the lease say, “You spill it, you clean it.”

I must confess, I did a bit of that work without telling the world. Back in early June, I decided to flush Eddie’s coolant system, since he hadn’t had the coolant changed since 2008, shortly after his purchase and we found a bolt on the water pump had worn a hole in the radiator.

A proper job of it is done by draining the antifreeze and filling it back up with water and a helping of coolant flush. Seriously, that’s what it’s called. You just ask for it by that name. A few weeks are then spent driving normally with the heater on while the flush works through the system and cleans it up. The water and all the crap that got picked up is drained again and new coolant is administered.

But because it was the start of summer, I didn’t want to drive around with the heater on. I’ve had to drive without air conditioning in the humid August days of the mid-Atlantic coast, and the last thing on my list was adding more heat to that equation.

I also only get one day at a time to work on Eddie. My lease also prohibits automotive work on the premises, so I venture to my parent’s house, where there is a tree providing shade, a fridge full of cold drinks, and a hose to facilitate radiator filling. I do wonder how I got away with working on that scooter, given the lease terms.

Draining the system is straightforward enough; find the drain plug and open it. Old antifreeze is collected in a bucket, and the hose fills the system back up. I run the engine with the heat on, letting the water get hot and start dissolving the crud, then it’s drained again.

What a lovely shade of brown it was.

Fill, run, drain, repeat again, only this last time with coolant flush, just to get the very last of it. By the end, the water coming out looked almost as clear as the water going in. Close enough for me.

Between doing these fills and drains, the engine was running, so I had little to do while internal combustion did its thing.

You may recall Eddie was in a front-end collision before he came to me, specifically the front-right.

It must not have been major, or else the car would have been totaled. But it was obviously enough to bend the front-right door frame, such that there is terrible wind noise on the interstate, and necessitate a new front bumper. I know it’s not original because the new one had to be painted, and the shop didn’t use the correct primer, so the paint it’s got is flaking away bit by bit. Flex primer is not an option for painting plastic parts, I’ve decided.

The collision also tore up the forward fender liner and splash guard. These serve only small purposes: mitigate the water that splashes onto the serpentine belt and support the ABS wire as it leads to the main loom. Being shattered into five separate pieces where there should only have been two connected ones, they didn’t perform well in either duty.

Being harnessed to the splash guard, the ABS wire ended up being crushed by the fractured pieces. That was enough to puncture a small hole in the wire’s insulation. And you remember those oil leaks? Yeah, oil loves small holes.

Oil also corrodes copper, which is what wires are made of. This eventually meant the ABS module had lost the connection to the front-right wheel speed sensor. For a system that monitors each wheel’s rotational velocity, a speed sensor is kind of important. So important, that losing one sensor means the entire system shuts off and a little light on the dash glares at you. You still have brakes, of course, but you should be wary in slippery situations.

It’s been an issue for a while, if I’m honest. I’ve got decent tires, and I know to limit myself in the rain or snow, but warning lights bug me. Even if it’s not really a problem. Besides, I had the time, a bunch of spare wire (courtesy of dear ole Dad) and I’d already jacked up the front-right wheel.

(The radiator drain plug is on the left. I wanted gravity to work with me on this.)

What makes oil awesome is that it penetrates into the tiniest of spaces, worming its way in and breaking metals loose from other metals. That’s great, unless you’re talking about wires.

The small hole punctured into the ABS wire’s insulation made a nice entryway for Eddie’s leaking engine oil. The corrosion runs all the way from the sensor plug to the main loom. It’s not as bad near the loom, but it’s still there.

So I’ve got the time, I decide to replace the bad wire. It’s something I’ve already done before, but that was four years ago, and the oil leaks hadn’t been solved back then. So new oil got in, basically at the same spot as the old wire. Time to put new wire in.

Up until recently (not recent enough to do this for the fix, unfortunately), I had no idea the wire connectors I was using will heat-shrink. That would have been very helpful, considering I was trying to keep oil out of the connections. Electrical tape only does so much.

So the ultimate goal is to stop the oil leaks. For that, I turned to a coworker for assistance. A master technician for Toyota in a previous life, he suggested starting at the top with the valve cover gasket. It made sense, I decided. Gravity being the funny thing that it is, taking things that were up high and putting them on the floor, a leak up top would cover everything below in dead dinosaur juice.

My coworker-come-Sherpa enlightened me to the wonders of Scotchbrite pads and brake cleaner that day. Mating two metal surfaces with a molded rubber gasket works best when said surfaces are clean and smooth. Scotchbrite is like a hand-operated pressure washer. Those pads felt like they could scrub off skin, if I was inclined to do so.

But I’m not into exfoliating, so I focused on the valve head cover. When the two surfaces were all shiny, the new blue gasket was wedged in and the bolts were tightened up. I gave the block some more cleaning around the joint to make potential new leaks show up better and crossed my fingers.

Staring at those broken pieces that once were fender liner solidified my resolve to finally replace them. After all, they’d been in my way when the radiator hose needed replacing, when the AC compressor needed work, and the three times I’d replaced that torque mount. If I didn’t replace them, I’d be running new wire for this sensor again in about a year.

These being somewhat unique parts, the local stores were unlikely to have them. To the Internets I went, and was able to find the ones I needed. Had to get them from two separate stores, because each of them had one of the parts but didn’t carry the other. With that, it turns out there’s a bit of ignorance in the “All the parts your car will ever need,” slogan.

And, of course, the parts had a cheap feel to them. I wasn’t expecting carbon fiber from McLaren, just something a bit thicker, with more substance. It’s of small consequence, since the parts are function over form.

The funny thing about finally seeing how the part is supposed to go together is that makes you understand things. Like the fact you’re missing a few fasteners.

Times like this make me grateful my dad is a packrat (sorry, Mom). If I need a nut, bolt, and two washers to secure the splash guard to the sub frame, I’ll find them. It’ll take almost twenty minutes of picking out likely candidates from three different bins marked “Assorted,” but by Grabthar’s Hammer, and the Sons of Warvan, I shall find them.

But why am I having to look for a fastening solution? Because whatever shadetree shop Eddie was taken to after his crash decided to take shortcuts. And who could blame them? The Sunfire is hardly going to be a collector car, so why endeavor to preserve it? This is a daily beater, both in my hands and the previous owner’s. As long as it runs, who cares if the splash guard is really connected at all six points?

After seven years, I care. It’s not David taking down Goliath with a slingshot. It’s David’s next door neighbor with asthma coming out of nowhere to thrash Goliath to a pulp with his bare hands. It’s not a long bet if the bookie never put odds on it.

But David’s neighbor still needs his inhaler. That’s why I then turned my attention to a puddle of red fluid that’s started to appear now that I’ve cleaned up the leaked motor oil.